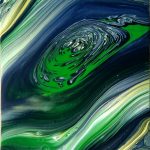
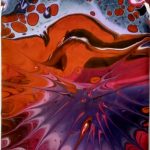
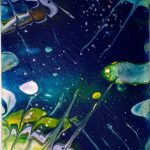
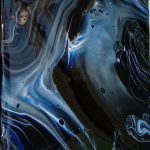
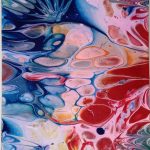
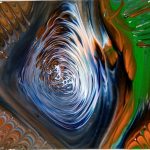
A Basic Guide to doing cheap acrylic flow
Refusing to be thwarted by acrylic flow, I decided to do my own thing and not worry about trying to replicate what more experienced people have achieved. Don’t get me wrong, I’m in awe of the amazing pictures that have been created by those who know what they’re doing and have all the right products, but I didn’t want to spend a lot on paints and flow mediums and the equipment with which to create flow paintings, but that’s coz I’m a bit of a tight-wad!
I’ve seen a live demo and watched countless YouTube videos; the techniques vary but there are some rules which seem to be consistent.
I did buy some flow medium but my early attempts at acrylic flow just didn’t work. Turns out I wasn’t using anywhere near enough paint and probably wasn’t using the right flow medium (Floetrol is popular but there are others which also do a fine job); I was also using the wrong volumes of water and the wrong amounts of silicon. Apart from that, I was doing everything perfectly…
So, having entirely failed to achieve cells no matter what I did with the silicon, and having finally run out of flow medium, I decided to give up on the whole thing and naturally bought a load of cheap acrylics and persevered.
But my way. Cheaply 😊
What I use:
- Cheap acrylics; you can always upgrade to better quality ones, but for starting off and practising techniques, I can’t see the point in wasting decent paint;
- Glass tumblers; for mixing paint and water (and silicon if using). I will avoid using plastic cups if possible; they can’t be reused as the paint clings in the ridges and they break easily. Glass tumblers are sturdy, can be cleanly rinsed out and obviously re-used; plus, if they break, glass can be recycled.
- Small plastic spoon; for mixing paint and water (and silicon if using). A plastic spoon can be cleaned and re-used. Some people use flat wooden sticks which also work well.
- Palette knife for creating a wet base for your painting;
- Liquid silicon depending if I want to try and create cells, otherwise I leave this out;
- Clean water; I keep a tumbler of clean water for adding to my paint. Always add clean water to your paints to maintain purity of colour. Have a separate tub of water for washing your mixing spoon, palette knife etc.
- Clean empty cup/tumbler for pouring your paints into before applying to the canvas;
- Small canvasses; ideal for practising different techniques and effects; it also means if you have a big enough drip-tray, you could have two or three on the go at once.
- Stand and drip-tray; you’ll need something to stand your canvas on, which will need to sit in the drip-tray to catch the overspill of paint. I’ve seen lots of fancy versions of these; sometimes, specially-constructed drip trays are used with blocks or supports for the canvas to rest on.
The canvas needs to stand high enough from the drip-tray so that it doesn’t sit in its own paint. I use a very technical combination of a bulky ice-cream tub lid (to rest the canvas on) which sits in the lid of one of those large round tubs of chocolates which are obligatory at Christmas or when you are depressed at how badly your artwork is going.
I will shortly be upgrading to a large plastic tray, actually once part of the inside of an old fridge door, but it’s lightweight, completely sealed and approx. 1” deep. It’s big enough to contain three small dripping canvasses so I can have several ideas on the go at once.
Plastic lids and trays can also be re-used because once the paint is dry, it can often be lifted or scraped off. You don’t want the drip-tray to eventually fill up with dry and congealing paint so it’s good practice to remove the excess regularly. ‘Keep your weapons clean’ is good advice, upheld by artists, gardeners and probably assassins.
So that’s the list of equipment for doing it on the cheap.
There are plenty of acrylic flow/pour tutorials online so I will just summarise the main tips here:
- When mixing paint, blend it thoroughly by mashing it more than whisking. You want to avoid beating in air as this will create bubbles on the paint surface and affect the appearance of your painting.
- Mix each colour with clean water to a consistency slightly thicker than double cream. If that isn’t helpful, drizzle the paint from the spoon into the body of the paint. If it creates a brief trail before melding back in, that’s probably perfect. But you’ll get different effects and results with different consistencies so don’t be afraid to experiment.
- Clean your mixing spoon/stick after mixing each colour paint.
- Prepare your canvas by applying a white base coat of paint with your palette knife, much like icing a cake. (Not that I would know but I’ve seen it done on the TV!)
- Whether you’re doing the flip-cup technique or a direct pour, this will be done straight onto the wet canvas base. This helps the paint to slide across the canvas.
Watch the tutorials but don’t get too hung up on the methods. Find your own way and make your own paintings. There is no right or wrong to this – every piece is unique.
You can exercise a certain amount of control over how the paint moves on the canvas and the effects that you can create in your picture, but it’s an unpredictable beast so try to enjoy the results instead of getting frustrated if they aren’t what you expected or intended. It’s always surprising what people like, so remember, even if you aren’t happy with the end product, it doesn’t mean someone else won’t want to buy it! Have fun and enjoy learning from your results.

